Showing posts with label 18th century sewing. Show all posts

Tuesday, November 20, 2018

Productive Weekend

I am a glutton for punishment. For some reason I like to do all my sewing with a rapid deadline. We went to Mount Vernon on Veteran's Day, which was supposed to be freezing. Can I start and finish a lady's cloak, a girl's cloak, a pair of girl's mitts, and a wool petticoat in time? You betcha.

Cloaks are not too hard to do generally. They are simple geometric shapes with a few pleats and some binding. What makes it time consuming is if you decide to line them. Naturally, Allie wanted them lined. These beauties are made in red wool plush. The bodies are lined with worsted wool and the hoods lined with silk taffeta. They turned out amazing.

Apparently, I need to read The Handmaiden's Tale because people keep saying cryptic phrases from it, and I have no idea what they are talking about.

I also made the tiniest mitts for the small one from white wool (bad idea in hindsight). Have you ever seen a toddler eat strawberries in white wool mitts? It's not pretty.

And for the cold, dad got... nothing. Luckily it wasn't too bad and I was able to keep warm in a sleeved waistcoat and worsted coat.

Thursday, October 25, 2018

The Roaming Tailor

It's not often that I get to travel far. As an apprentice father (I guess you don't hit Journeyman until your oldest is 7?) and generally very involved in everything individual, travel is not something we get to do often. But when we do, we try to fit in everything including visiting at least one historic site. I can't wait for my daughter to be old enough to complain that dad is taking her to another boring history place.

On a recent business trip, I got to stop by a site that I've been wanting to visit for years: The Old Barracks Museum in Trenton, NJ. The site itself was amazing. Gotta say that I'm a little jealous of the amenities in comparison to my usual stomping grounds at Fort Frederick. Ok so not really, it's mostly that I'm jealous that the walk to the bathroom is significantly smaller; visitors are notorious for arriving when your bladder is full. But I am green with at their tailors shop.

Unfortunately, David, the resident tailor at the Old Barracks was not in the day that we visited, but after shooting the breeze with another one of the staff Asher (who is pictured and awesome by the way) he was kind enough to give me a peek into their tailor's shop.

The shop is fantastic. They have many original items including a tailors yard, multiple pairs of Gambia shears, geese, you name it. The thing that I was most jealous of was the natural lighting. The shop is set up to provide the most natural lighting through two large window that blast the entire room with light. You could truly work a full 18th century work day. The two tables inside provide adequate space for all sewing needs. It's a testament to efficient use of limited work space.

We were so impressed that my daughter tried to take home a souvenir in the form of an original pair of Gambia scissors. She has a penchant for stealing scissorsm, and was caught moments before the act in the picture to the right. David, if you're reading this, no need to inventory your scissors; she didn't take them.

The shop at Fort Frederick is still being built, and I can't wait for it to be done. Based on pure design limitations of the barracks, we'd never be able to get that much light into the shop, but I can't wait until the room is finished and I can have my own little fiefdom. Though I may have to worry about small children trying to steal my tools.


Wednesday, October 24, 2018

Mid Century Double Breasted Coats

I like weird fashion in case you haven't noticed. I've always had a slight obsession with anything double breasted because I find them interesting in how they look, how they're made, and everything about them. The civilian double breasted frock coat seems to have evolved out of the military coats, which were double breasted and worn open to display the distinct regimental features. In fact, the civilian coats seem to use the exact same patterns as the military variations with the addition of some fashionable components found on civilian coats.

Another style of double breasted coat, called the "Pea Coat," and mostly associated with sailors, is also referenced in numerous runaway ads. Although a double-breasted coat in existence in the mid-18th century, this is not what I'm talking about here. The pea-coat is a utilitarian short coat that does not include the stylings of a frock, including the skirts, and side and tail pleats. The pea coat simple terminates at the base of the turnbacks and includes none of the elegant features of the frock.

There are a few surviving examples of 1770s style double-breasted coats, and many examples as you get closer to the beginning of the 19th century, when the style became more popular, but the mid 18th century double breasted civilian coat seems to be rarer than than later in the century. Still there are various examples that can be seen in artwork from the aristocracy, middling, and poor classes.

For the most part, the pattern of the coat seems to mirror mid-century military regimental coats. The visible difference in the civilian variation is appears to be the pocket shape and and sleeve cuff which tends to vary for more fashionable or utilitarian purposes. 

Cuffs are pictured to be in the overly large justacorp style, a fashionable folded over cuff, and straight and mariner cuff. Pockets appear to follow the same variation from the most utilitarian rectangular pattern to fancier pointed shapes.

As a whole, the coat turnbacks seem to follow the same form of the military counterpart with the turnbacks not extending the full length of the front and transitioning to single breasted for the last button or two. The also appear with plain buttonholes or with embellesments that appear to be some for of lace.

The skirts also vary based like military variations being both short and long variations. The referenced caricture of Sir Thomas Robinson is very interesting in that the color of lining of the skirts varies from the turnback color.

The turnbacks also appear to vary in style. They are styled in both the same and complimentary color as the coat itself depending on the wearer.

 The wear itself also seems to vary depending on the person. Coats are pictured worn in with the turnbacks secured or worn loose in various image.

 Overall, this is a very interesting garment that seems to vary in any which way that it can. As someone who has an affinity for interesting clothing, and enjoys making them even more, I have a feeling that this garment will be going on my winter sewing list.

Wednesday, September 12, 2018

Coat Refurb Progress

It's starting to become a coat again. The project to refurbish my 1770s broadcloth coat to make it more historically accurate is progressing nicely and the (mostly) unlined body is complete.

In my last post, I had just finished attaching the buttons and sewing the button holes on the front panels. Since then, I have sewn new pockets and attached them, lined the skirts of the back panels with China silk, sewn hooks and eyes in place to close the front, and attached the front panels to the backs completing the torso of the coat.

I've also cut all the visible lining in China silk. Most surviving coats are either lined with either silk or some form of worsted in the visible parts and some form of cheap fabric in the back. This is the first time that I've worked with China silk and it is very interesting. The stuff is slippy to no belief so it makes tracing, cutting, and pinning a frustrating adventure. It's a very flexible fabric though, so maneuvering it in place is fairly simple.

Next up, I will line and attach the sleeve cuffs, and attach the sleeves. Then it will be time to do the cape (collar).

Wednesday, September 5, 2018

Coat Series - Step 1: Cut Your Pattern Pieces

I toyed with making this a pre-step. In the end, I decided that pre-treating your fabric and cutting your pattern is actually very important to your finished product and can affect the overall garment and should be included as a step unto itself.

Choosing a Pattern
There are many various patterns out there from a few vendors that do a good job. My advise: you get what you pay for. If you are looking to make a costume, go ahead and buy a pattern from a company that makes costumes. If you want to reproduce 18th century clothing, buy a pattern that cites its sources.

You can also create your own pattern using any of the various books I've mentioned in previous posts. You can find a multitude of tutorials on how to blow up a book patterns through a simple google search, so I won't go into it here. A friend of mine uses an old overhead projector to display the pattern on the wall and then traces onto pattern paper based on the required size.

If you want my two cents, I'll let you know what patterns that I use.

Selecting and Treating Your Fabric
The most fun, yet stress-inducing part of sewing is choosing the fabric. Use natural fabrics that are suitable for your impression. Avoid synthetics as much as possible (a small percentage occasionally can't be avoided in some wools). Before going out and buying that fancy silk brocade, decide who you are going to be portraying and what that person would be wearing.

Honestly, silk sucks. It doesn't breathe as well as linen and wool, and you can't do immersion laundering on it either. My two cents, linen and wool are your best friends. They are suitable to most classes and are generally durable fabrics. Linen is great in the summer for cooling and can be washed by hand or in your washing machine (if you're confident in your stitching). Wool regulates the body temperature, lays great, and is very easy to work with.

**As I rule, I do not fully immerse my coats for washing because it removes the stiffness from the buckram. I will spot clean the outside or odorous parts, and, if required, replace the lining to rid the smell.**

If you plan to wash your linen garment, wash your fabric before cutting the exact same way that you plan to wash your finished garment and hang to dry. Linen will shrink a bit, but not that much. I do not wash wool, but if you think that the color will bleed from your body heat, it's a good idea to soak your wool in hot water and then hang dry to remove that excess dye.

Tracing Cutting Your Pattern

None of my pattern pieces have seam allowances. I draw them on myself at 1/4 inch to be more consistent with extant garments. Modern patterns use 5/8 inch seam allowances, which is too big for the 18th century (you can use whatever seam allowance you want; it's really your preference). Not only that, but outside edges of wool broadcloth garments should be left raw and have no seam allowance in the 18th century fashion. Here is my pattern process:

For Linen or Worsted Wool (Fabric that Frays)
1. Lay out fabric in folded in half length ways (making a long, thin rectangle)
2. Trace the true pattern pieces pieces using tailors chalk, charcoal pencil, or heat erasing quilter's pen, etc. starting with the large pieces of the body, then the smaller pieces.
3. Add 1/4-inch seam allowance to all sides of true pattern pieces.
4. Pin all pattern pieces and cut
5. Repeat for the lining

For Wool Broadcloth (Fabric that Does Not Fray)
1. Lay out fabric in folded in half length ways (making a long, thin rectangle)
2. Trace the true pattern pieces pieces first using tailors chalk or a charcoal pencil starting with the large pieces of the body, then the smaller pieces.
3. Add 1/4-inch seam allowance to only the inside seams of true pattern pieces. Any seam that is not joined to another i.e. lapel seams, skirts seams will be cut at the true pattern piece line.
4. Pin all pattern pieces and cut.
5. For the lining: Repeat steps 1 and 2, but at Step 3 add 1/4 inch seam allowance to all sides for the lining. Pin and cut.


18th Century Coat Series: Introduction

I'm pretty free with information. For some reason, those in this hobby don't seem to be. I'll tell you anything if you ask though. I often get asked how to actually make clothing step-by-step in the period method, and how it differs from modern sewing other than doing it all by hand, so here it is straight from the horses mouth. In this series, I plan to take you through the basic steps on how an 18th century coat or waistcoat is made in the period method, including the steps and stitches used.


In case you want to do your own research, or you think I'm full of crap. Here are the sources that I use for my methodology:

Art du Tailleur by Francois Alexandre Pierre de Garsault (1767)
Encyclopédie, ou dictionnaire raisonné des sciences, des arts et des métiers by Denis Diderot (1771)

Monday, August 27, 2018

Mid-18th Century Frock Coat

Here's my first attempt at a mid-18th century frock coat. If you've read any of my other blog posts, you will know that I'm a fan of/glutton for speed sewing. This was probably one of my most insane endeavor to date. A start to finish (including making the buckram for the body pieces), unlined frock coat in 6 days. By then end of it, I was exhausted, but it turned out well enough and was functional.

All and all, I think that it turned out well enough. There is nothing fancy about this coat at all. It is part of my impression for the Artificer Tailor at Fort Frederick. This is a simple, unlined linen work coat that is perfect for summer wear. There are only 12 buttons (10 on the front, 2 on the side vents) and include 10 partially cut 2.5 inch buttonholes with 1 inch, cloth covered buttons.

The fabric is this really enticing color of brown that shifts between brown, green, and greyish tints depending on the lighting.

 I still need to make a few minor adjustments to it for it to be truly done. The skirts for the vents need to be tacked in place so that they don't flap about everywhere, and the interior seams need to be zig-zag stitched in place to prevent fraying. Other than those few minor details, I claim mission success.


Tuesday, August 21, 2018

Pattern Hack: Cut Off Those Seam Allowances

Two posts in one day. What am I thinking? Perhaps I'm not and that's why I'm taking the time to pontificate more than my usual amount. This pattern hack is simple, terrifying, but will make your clothing so much better. Cut the seam allowances off your pattern pieces. Just do it!

Modern patterns usually call for over large 5/8 inch seam allowances, which is way too big compared to the tiny seam allowances on original garments. Costume Up Close mentions that a study of seam allowances showed that most were somewhere between 1/8-3/8 inches depending on the garment. I split the difference and go with 1/4 inch. To achieve this, I trace the pattern piece, add the seam allowance, then cut.

If you are confident in your exactness of tracing, you could always trace each piece twice in opposite directions. The traced lines then become the stitching lines for the pattern pieces. Then all you have to do is guesstimate the seam allowance but cutting about 1/4 inch outside of the lines.

The other reason that I completely cut off the seam allowances is to accommodate making garments out of wool. Period wool garments typically have raw wool edges for the outside parts. Meaning, the broadcloth edge is not folded under like you would do with linen, cotton, or worsted. Why? It saves fabric and it shows off that your broadcloth is of a quality that it will not unravel. Trust me, nothing looks quite as sexy as a raw edged wool garment.

When using broadcloth with a raw edge, you have the added complexity of remembering which seams are part of the body and need a seam allowance, and which are the raw edges and do not. Trace twice, cut once.

Buttonholes and Distractions

 This is how I roll. Start one project, make decent headway, then get totally distracted and do something else. This is (somewhat) one of those cases. I've been working to make my green broadcloth frock coat more historically accurate, and I made pretty decent headway on it last week. Unfortunately the process involves almost completely remaking the coat.

So far I've torn the coat apart, cut off the edge seam allowances, re-attached the interfacing, and finished the button work. 1770's buttonholes are a thing of beauty if done correctly. They are thin and long--about 2.5 times the size of your button. This coat has 1.25 inch buttons, so these buttonholes are 3 1/8 inches of non functional beauty. Paired with the deaths head buttons, this coat is starting to look awesome.

I still have lots of work to do before it's done, but it's starting to look like a coat again. Naturally, though I took one step forward, so I need to take two steps back.

About a month ago, while portraying a refugee at Fort Frederick, friend of mine suggested that I contact the Fort to see if they would be interested in adding tailoring services to their collection of living historians. After a month of ironing out the details, I'm pleased to announce that I am officially the Artificer Tailor at Fort Frederick! Huzzah!
I will be at all the 18th century events for the remainder of the year, and will continue with new programs in 2019. I am very excited about this opportunity, and have all sorts of great plans and ideas that will be happening at the Fort.

First thing is first: I need an 1750s ensemble. All of my clothing is more appropriate for the 1770s. I could get away with 1760s with some of my waistcoats because extant garments did show a few examples of shortening panels in the 1760s, but I have nothing that is remotely 1750s. Looks like I'll be whipping something together in six days.

I would love to be able to make both a coat and waistcoat in six days, but it just isn't happening. Luckily for me, there are many mid-century images of working men wearing only a short coat with no waistcoat. Looks like I'm going for that. I am making a simple brown, unlined linen short coat similar to the one in this picture. Time for some speed sewing. What could go wrong?

Thursday, August 16, 2018

Pattern Hacks: Do Your Research

Before you can even start, you should do your research. I don't mean month and months of it, but you should have a basic understanding of how the clothing is constructed. Here's a little secret, techniques varied from tailor to tailor in the 18th century so there are various correct ways to do something. Find what works for you. I am going to suggest three books. I have more in my library, but these are what I would call my must reads.

My Book Suggestions

For a breakdown on garments, I suggest reading Costume Up Close by Linda Baumgarten. The Forward section related to construction and stitching is probably the most useful three pages that you will run across. The analysis of the garments is exceptional from a deconstructionalist perspective. My only complaint is that the pictures are black and white, so not much detail can be gathered from the images.

For actual period instructions, check out the translated section on the tailor from the Diderot and d'Alembert Encyclopedie. This is a fantastic source for garment construction. The text not only instructs in clothing construction, but also the cutting and fitting portions of tailoring. The language is a bit confusing if you are unfamiliar with 18th century instructions and terms, but the the instructions are straight forward.

The final book that I suggest is the Workman's Guide to Tailoring Stiches. It's not the most user friendly book, but the stitch details and instructions are fantastic. I put this one last for a reason because you should read it last. After absorbing the information from the other books, this book shows you what stitches to use to put it all together.

My Museum Collection Suggestions

The second part of your research is looking at original garments. Several museums have massive collections of 18th century clothing, but only a few of them are looked at in fine enough detail as I would like. I want to see the inside, up-close-and-personal details on all of the clothes that online collections cannot provide for each item. The collection of Colonial Williamsburg and the Victoria and Albert Museum provides a good breakdown of materials used in each item, and they occasionally provide the detailed images that I desire for some of the items.

Other good sources are The Met, Los Angeles County Museum of Art, Royal Ontario Museum, and of course check out Larsdatter.com and 18th Century Material Culture for a consolidated offering of original garments.

Wednesday, August 15, 2018

Pattern Hack Series: Introduction


Alright, so new (to this blog) idea. Let's hack some patterns to make the resulting garment more historically accurate. American Duchess does it all the time for ladies clothing, but I don't know of anyone doing it for men's clothing, so I will. I've lamented a few times with my wife that I wish there was a men's equivalent to The American Duchess Guide to 18th Century Dressmaking because men's attire is so much different in construction than ladies but equally as confusing if you don't have the experience. Ultimately, I'd love to write one. (Maybe if I write loud enough someone will offer me a book deal?)

So what the hell am I talking about? Pattern hacking? What is that?

There a few good patterns for creating 18th century clothing out there. You can typically tell the good ones because they cite the original garment that it is based from. The pattern pieces provide you with all the requisite pieces to reproduce a period garment. The problem is that the vast majority of instructions given for most patterns follow modern clothing construction and do not follow the 18th century process. The purpose of this series is to show you what I do to use those pattern pieces to make a more historically accurate 18th century garment and leave you looking Macaroni AF.


Tuesday, August 14, 2018

Coat Pocket Placement and Buttonholes

Pocket Placement

An unfortunately often overlooked detail in reproduction 18th century clothing is the placement of the pocket flaps, button hole and buttons. This detail, though small, can really make or break the look of an outfit. Most spectators would not know if your clothing was made out of inaccurate fabric, is cut incorrectly, or is of the wrong decade, but if your pocket is in a weird place they'll be able to tell that something is up.

Pocket and button placement is actually fairly simple. It should follow a straight line. If you draw a line from the bottom most button(hole) to the top of the side vent, the top of your pocket (or at least the top corners) should be right on that line. You can see that illustrated on the pattern to the right and again on the picture of the coat front that I'm redoing (pardon the terrible looking pocket flap; it's part of what I'm redoing). The same guidance is true for waistcoats. 

I have seen far too many frock coats and waistcoats that look absolutely wonky because the pockets are either way too high or way too low. It may be a small detail but spectators notice. It has nothing to do with knowledge of historic clothing. The logical symmetry just looks off and people take note.

Pattern Hack: A Note on Button Holes
I have a love/hate relationship with buttonholes. I love how a finished, properly placed buttonhole looks, but I hate sewing them.

In Art du Tailleur, M. de Garsault instructs that buttonholes be spaced about two inches apart on coats and waistcoats, which is a good general guidance. Most extant frock coats have 10 buttonholes, so you may find that spacing your buttonholes exactly two inches apart gives you with extra space between the top hole and the collar. I found that spacing the holes 2 1/8 inches a part gives me perfect spacing for 10 buttonholes. I came to that conclusion after plenty of experimenting, which can be seen by the various chalk marks on the coat front.

Drawing the button holes is fairly simple if you have a quilting ruler with a grid pattern on it. Once you have the first hole drawn, you simply draw the next one parallel to it 2 1/8 inches above it. Keeping them parallel causes the buttonholes to angle in relation to the curved lapel as you move further up the body. I find that most commercial patterns place the bottom button hole correctly, but they lose the proper spacing as you move up the torso so using this method creates a better looking coat front.

Another detail that is overlooked in reproduction patterns is the size of the buttonholes. They are too short. The pattern that I use calls for 3/4-1 inch buttons and then has lines for 2 inch-long buttonholes. In the 1770s, a fashionable gentleman's buttonholes would be about 2.5-times the size of the button. I am using 1 1/4 inch buttons on this coat, so the holes are 3 1/8 inches long. I'm gonna look Macaconi AF when this thing is done!

In a later post, I plan to cover my method for doing long work buttonholes, but I think that I'll leave it here for now.


Wednesday, August 8, 2018

So... Many... Buttons...

Sure, it would be a good idea to change out all the buttons on your frock coat to be deathshead button. How many buttons are on your frock coat? 28. How big are they? 1 1/4 inch. This was a bad idea, but at least they look good. 16 down, 12 to go.


Thursday, August 2, 2018

Deathshead Button Tips

An unfortunately underrepresented detail in reproduced men's 18th century clothing is the deathshead button. If you were to take a census of the buttons on a group of living historians you would most likely find that metal buttons take the lion's share as they are prevalent on most mainstream clothing. Then you would find cloth covered, which is more accurate to the period. Deathshead buttons taking up the rear.

In reality, metal buttons were rare. A very quick look at period artwork and extant garments illustrates that cloth-covered and deathshead buttons were the most common. The reasoning is simple. Metal buttons were more expensive, and they weigh down the garment in an undesirable fashion causing waistcoats and coats to lose their desired form on the person. Metal buttons are more popular among reenactors because they require no time to manufacture, and they are easy to replace. Those who prefer to be more accurate choose cloth covered buttons because they are simpler to make than the deathshead alternative.

Deathshead buttons are awesome. There is no denying that. They are also a pain in the butt to make. Silk thread is slippery which does not mesh well with the process for making deathshead buttons which is to wrap a square around a circle. I avoided them for the greater part of a year because the thread constantly moved until I learned a trick that makes the buttons turn out great every time.

The process for making a button is simple in theory. Wrap three loops of thread around the mould to make an X. Then using the ends of the X as corners, wrap the thread to make a box. Secure the thread on the back and you're done. That works ok for linen thread, but when using silk, the X threads constantly slide so you lose your corners. Also, as you get closer to the center of the box those threads will move as well. Here are a few pointers that I use to make your buttons turn out great every time.

Tip 1 - Create a More Secure X

Instead of just wrapping the thread around the button mould to make and X, I thread the end of my silk through a needle then draw a length through the hold in the center of the mould. I then weave that side of the silk thread through the hole in the center of the mould to create the X. After I've created the X, I secure the crossover in the hole with a knot and cut of the excess leaving the spool side of the thread still attached. Weaving the thread through the hole makes a secure X that does not move no matter what. This is the most important tip and the key to making a good deathshead button. You will use a little more thread, but it's worth it.

Tip 2 - Use a Pin


The second most frustrating part of wrapping these buttons is that the thread does not stay in place as you get closer to the center. To prevent that from happening, stick a pin through the center so that the thread on the back of the button has an anchor point as you change from wrapping vertically to horizontally and vice versa. On buttons that have a diameter larger than 5/8 inches, you can do a few wraps without the pin, but with smaller buttons I would use the pin throughout.

These pictures show me making a 5/8 inch button using the a pin the entire time. The wraps turn out fairly uniform by themselves and can be adjusted slightly with a pin, toothpick, or other small item that you can use to push the threads into the desired place.

After finishing my wraps, I will loop the thread around the pin on the back of the button a few times to anchor everything in place. Then I cut the thread and use a needle to secure the back in place.

I have found that smaller buttons do not turn out looking as well as larger ones. My 1 1/4 inch buttons for my frock coat look exponentially better than these smaller buttons for my waistcoat.

Tip 3 - Get Some Pliers

Securing the button in place can be the hardest part if you don't have the right tools. If you made your button correctly the center is a tight mess of strong silk thread. Driving a needle directly through the center of that mess to secure the center in place is no picnic. Take my advice and forego strong manning it by using a thimble and a pair of pliers. Use the thimble to push the needle through the button until you can see the point on the other side, then use your pliers to pull it though. It will save you so much time, not to mention holes in your fingers.

Tip 4 - Buy Enough Thread

Deathshead buttons look awesome, but they use a lot of thread and are expensive. Button moulds are about $0.80 a piece and silk thread is about $6.50 per spool. In my experience, you can make three 1 1/4 inch buttons from one spool of thread, or eight to 10 5/8 inch buttons. An average frock coat has 28 buttons, so you're talking about nearly $90 to make your buttons. That may be expense, but it is totally worth it to be the most macaroni person out there.

Wednesday, July 25, 2018

Coat Linings

As I mentioned in an earlier post, I am in the process of reconstructing many of my current garments to make them more historically correct. Aside from stitching techniques, I am also trying to make my construction in line with extant garments. In my experience, I have found that most reproduction civilian garments are lined with some form of plain light linen because it's cheaper, cooler, and easier to construct than alternatives. However, if you browse the museum collections, you will find that linings are typically a combination of textiles, typically consisting of a silk or worsted woolen fabric on the parts of the lining that may be visible as your body moves and a cheaper fabric (linen) in the unseen back portions.

They most common lining colors that I have come across are gold, silver, and black. While those colors would go well with my green broadcloth coat, I wanted to see if any extant green wool coats were out there and see what they were lined with. That's when I ran across this beauty in the Royal Ontario Museum.

Not only is there an extant green broadcloth frock coat from the 1770s, the ROM has photos of the lining of the matching waitscoat. Check it out. I have never seen anything like this. The only way I could describe this is half-lined. The lining is truly minimalist by only extending to the what may be seen during wear and then quickly terminating into the interfacing. The rest of the waist coat is constructed like an unlined garment, save for the back panels that are fully lined in silk. Strange.

 It makes me curious as to what is going on inside of the coat. Potentially, the silk coat lining may end a few inches past the coat edge. I'm curious as to why this was done. Perhaps, the customer only had a set amount of silk and the tailor was working around a shortage? Perhaps, the customer wanted and unlined suit for summer wear, but still wanted to give the appearance of a lining? But what's the deal with the silk back panels in the waistcoat? Maybe it was altered?

Whatever the case this is very interesting.


Monday, July 16, 2018

Finished Waistcoat and Playing a Tailor

Got the waistcoat done in time for my event at Fort Frederick portraying a refugee. Didn't get my diet done in time though 😂 Maybe if I wasn't spending all my time sewing, I would have enough time to exercise. I'm pushing the "tight without constraint" a little bit. I may not be constrained but my buttons sure are.

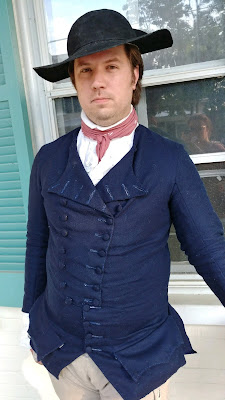
For this event, I was portraying a refugee tailor who was forced to leave his home in a state of undress, thus only the sleeved waistcoat and no coat. As per usual, no pictures of me were taken at the event, but my wife snapped this one at home before I changed back into 21st century attire. It was a fun event, I spent most of my day working on mariner cuff flaps for for my waistcoat and making death head buttons and talking to visitors.

It was a nice day and a great event. I'm hoping to be doing some new stuff at Fort Frederick in the next few months, but those plans are in the very early stages at this moment.


UPDATE!!! Someone got a picture of doing things! See ma, I don't just dress up like a weirdo for the fun of it.

Word of advice to anyone sewing in a historical manner. Never sit tailor style on a bench. The edge will dig right into your ankle bone and completely cut of the circulation in your foot. Then you may or may not try to stand up and fall over because your foot is completely numb. Spoiler warning: you will fall over. Anyways, here's us sewing at Fort Frederick during the "Repair to the Fort," Pontiac's War event. As always, I'm making a stupid face.


Thursday, July 12, 2018

Failures in Hat Making

Failure is the best way to learn. The only hope is that when you do fail, you can salvage it into something that will be useful. This was a decent failure in my book, but I think that the lessons learned will make a load of difference the next time that I venture into hat making.

I wanted a fantail hat for less formal occasions that provides more shade than a cocked hat. The design is fairly simple in theory: cock up the back of a round hat and call it a day. There are so many 18th century re-enactors who wear hat blanks as their headgear so this should be a walk in the park. If only it was that easy.  I am not a conscientious objector. If I know that something is wrong, I can't ignore it and say close enough, which is why I couldn't cock the back of hat blank and call it a day.

Many sutlers sell wool hat blanks of a decent quality wool and manufacture that are a good starting point for making a hat. The big problem though is that the blanks are oval blocked as opposed the round blocked, which was exclusive to the 18th century. What does that mean to a non-hat affectionato? The crown on an 18th century hat is a circle as opposed to an oval. The hat won't fit your head as well because your head is not perfectly round, but the crown being the wrong shape is very visible when you can see most of the brim.

My first task was to shape the crown to make it round. If you've ever looked at hat blocks, wooden versions are mad expensive, do not come in a perfectly round pattern, and most will not produce a hat that will fit my giant, 24 1/4" head. To get the round shape, I cut a circle out of a scrap piece of 2x12 that I had laying around. I figured that I would need to make the base of the crown perfectly round using the wood piece, but I could adjust the top part of the crown by hand to make it round throughout. That plan worked for the most part.

I steamed the crown of the hat blank with a kettle to make the wool pliable and then put it over the round block. The band immediately became round, and the crown became misshapen. No problem though, it was to be expected. I put the hat blank on my plywood stand, creased the edges on the band with an iron, and weighed down the brim with some heavy books. Then, I left the hat on the wood piece for a few hours to dry and spot shaped the top of the crown later with a spray bottle and iron. Once I was happy, cut the brim to shape and admired my handiwork. 

The next day, I stiffened the brim using the period application of 2 parts clear shellac to 1 part denatured alcohol. I let that dry and then my hat was ready to be styled... except it didn't fit on my head. Because I was a dummy and didn't let the wool completely dry on the wooden disc, the entire crown shrunk as it dried. It shrunk over 1.5" total making the hat completely unwearable to me. 

I had to resteam the crown to stretch the brim back out. After letting it dry for a few hours, I again spot shaped the crown, and immediately put the hat back on the wood disc so that it would not shrink again. It did not. Unfortunately, because of the multiple steamings, shrinkings, and shellacings, my hat looks a little more worn than it's brand new condition. The crown is lumpy, the brim is warped in places, but it looks like a used hat, so I guess that's a plus. 

Like I said, I failed pretty hard shaping this hat, but I learned a lot. For next time, I'm going to just start with a piece of unshaped felt to make my hat. I found a place that sells round blocks for less than $30 that are made from automotive plastic that will fit my head and stand up to the steam treatment. I will also staple down the raw edges of the hat during the drying process to make sure that everything is even and does not warp. I will also do the hardening process while the hat is stapled down and before cutting. Hopefully it all works, and I will be on my way to hat independence. 

Monday, July 2, 2018

I Don't Speak French

I love primary sources for historic research. I'm a big fan of original recipes, instructional books, and journals. There's a great source document for tailoring methods from 1767 titled: L'Art du Tailleur by M. de Garsault. The short book lists the tools and methods of 18th-century tailoring and also provides a series of plates with stitch diagrams and patterns.

Fortunately, the book has been scanned into the public domain and can be easily be found online. Unfortunately, it's in French. However, I managed to find an English translation of the text and the plates: The Art of the Tailor

It's a good read for anyone interested in the construction of 18th century men's clothing from an original source. You will need to have a minor understanding of basic sewing and 18th century clothing for it to make sense, but it's well worth the read.

Thursday, June 28, 2018

Moving Right Along

Made decent progress over the past few days. Interfacing is completely secured on the front and back. Installed the turnback panels on the front edge, and I installed the pockets. My cat got a lot accomplished too. He managed to cover the entire thing in his hair.

Here's a shot of the interior of the waistcoat. The plain linen lining will be slip stitched to the turnback panel once it's installed to conserve fashion fabric. As is stands right now, this waistcoat will have 29 button holes on it. That may reduce to 25, if I change up my sleeve closure plans.

In the 18th century all buttonhole and buttons were functional. I'm currently researching if jiggers (a button on the inside of the coat to hold the interior panel in place) existed in the 18th century, but have not found evidence thus far. There will be a row of 10 buttonholes on the edge of each front panel, and the buttons will be on the inside edge.

The next big thing that I got done were the pockets. Pockets are something that drive me up a wall. I am a measure twice, measure again, and measure a fourth time just in case kind of person, and pockets just do not required that amount of intricacy. It drives me up a wall. I won't got into too much detail about the process of putting together pockets because there is a video of Henry Cooke sewing a pocket out there on YouTube that is much better than anything that I could put together. Check it out. 

Instead of a tutorial, you just get the finished product, cat hair and all. Deal with it. 

On our next episode: Button hole purgatory. 


Tuesday, June 26, 2018

Progress

Got started on my double-breasted sleeved waistcoat this weekend and things are coming together. My fabric came this weekend, and I have to say that I absolutely love it. I'm using an indigo colored kerseymere from Burnley and Trowbridge, and this fabric is amazing. The color is beautiful and I love how this fabric lays. It even marks well. Too bad that I got purchased the last of it and it was a one-off because I cannot tell you how awesome this stuff is. In a somewhat true-to-history fashion, my fabric came in a 1.5-yard section and two 1-yard sections that I will have to make work to cut all of my pieces.

I got off to a good start this weekend. I cut my linen pieces for the interfacing for the fronts and pockets then coated them with Tragacanth Gum to turn them into buckram. The first coat went fine. After I put the pieces out to dry after the second coat, we had a sudden storm show up and I had to run out in the rain to get them. Luckily, I was able to rapidly dry my pieces with a hair dryer so they weren't ruined and stiffened up nicely. I bet this sort of thing occasionally happened in the 18th century, and I wonder what they would have done in place of using a hair dryer?

These first two images show progress on the pockets. First, you baste the interfacing to the fashion fabric to keep it in place. Then you fold the edges and secure the fabric to the interfacing. Finally, you attach the lining by folding under the seam allowances and sewing an underhand stitch along the edges to secure the fabric. The top example is the finished pocket flap. The bottom example shows the pocket before the lining is attached and the basting stitches are removed.

You can see how nicely the flap cleans up once it's underhand stitched and the basting is removed. I try to keep the stitches small and uniform to keep them like original garments. Unfortunately, occasional imperfections in the linen thread make a clump show up in the outer stitching. Some people do not interface their pockets (I originally didn't), but I've found that they stay in place better and retain their shape on your body better if you interface them. 


If my waistcoat were a turkey, there is no chance that it would be dry with all the basting that I did. Can we first get into how ridiculous the interfacing piece looks? If you want the entire front panel to say in place you have to interface it. Everything about this waistcoat is ridiculous, and I love it. 

Cutting the interfacing piece was a bit interesting. to achieve that interesting shape, I traced the outside edge of the front panel piece on my linen for interfacing. I continued around to trace most of the neck and a few inches of the bottom of the piece. Next, I took the interfacing piece from the single-breasted waistcoat that this pattern is modified from, and lined up the back edge of that piece to the matching location on my pattern and drew the back line for the interfacing piece. I set the interfacing back 1/4" and basted the outside edge of the interfacing.

This was the first project that I've gone baste crazy on the interfacing and it is completely worth it to make your front much smoother and reduce the chances of loose fabric. When basting, I suggested working from the outside edge in to ensure that everything goes down smoothly.


 Personally, I baste from the wrong side of the fashion fabric on the edges of the interfacing to make sure that everything is in place properly, but base from the right sides in the big empty spots to make sure that the fabric is laying flat. If you have nice hard interfacing, you can't tell if your fashion fabric is laying flat against it unless you can see it. Doing the basting on two different sides leads to some pretty cool patterns on the fabric though.

On our next episode, we will be finishing the fronts by securing the edges and interfacing, adding the pockets and flaps, sewing on the turn backs, and sewing the button holes.