Thursday, July 26, 2018

Council of Safety Musket

"This is my rifle. There are many none like it, but this one is mine." 


Ok, so there were more like it, but I do not know of any rifles out there right now in the living history community that are like my rifle. My rifle is a to specification copy of a Maryland Council of Safety musket based off of documentation and surviving examples. What is a Council of Safety Musket you ask? I'll tell you.

A Council of Safety, more commonly a Committee of Safety, or just COS Musket were domestically produced muskets that were made in the early days of the American Revolution by each province to outfit their Provincial Line troops and militias. In 1775, seeing as the united colonies were at war with Britain in practice and Britain was most likely not going to sell munitions to the colonies that they are currently at war with, each colony's Committee of Safety (or Council of Safety in Maryland because we have to be different) past resolutions for local gunsmiths to produce muskets to outfit their troops. These domestically produced muskets, commissioned and purchased by the COSs for the provincial troops, were many of the provincial assemblies plans to arm their soldiers until the Continental Line began receiving arms from France.

Each colony's COS had different specifications for their COS musket, if they had specifications at all. Most of the muskets were based off the Brown Bess musket that was in use by the British forces. Most colonies based the design on the Short Land pattern or Second Pattern Brown Bess, but some colonies like Connecticut based the design on the older Long Land pattern Brown Bess with a distinctively longer barrel.

The Maryland Muskets were based on the Short Land Brown Bess, and had the exact same specifications as the British Musket. The exact specifications from the "Journal and Correspondence of the Maryland Council of Safety" from August 2, 1775 is below: 

"...The dimensions of which may be 42 inches in length, 24 of an Inch clear in the bore 1 1/2 inch diameter at the breech, and 7/8 of an Inch at the Muzzle) with Steel rammers and Bayonets 20 Inches in length including the Stock... If this mode meets with your Approbation, we recommend, that each Gun be proved before it shall be received, and when proved, that the word Maryland be stamped on the Barrel."

My musket meets those exact specifications down to the Maryland stamping on the barrel. My musket is a Pedersoli reproduction Brown Bess that was modified by Lodgewood Mfg., a gunsmith in Wisconsin that specializes in restoring antique firearms and modifying modern reproductions to be historically accurate to the originals. 

Lodgewood based the modifications of my musket on a surviving Maryland COS Musket that is in the collection of George C. Neumann and featured in his book on American arms during the Revolutions. Their write up of a more generic COS musket based on the Neumann example can be found here.


The stock of the musket has been reshaped to remove the distinctive Brown Bess features and make it more in line with the American muskets. The color was also darkened and the steel browned.

 A ton of work was done to the lock. The end of the frizzen spring was reshaped from the fleur de lis pattern found on the Bess to the leaf-like pattern on COS muskets. The hammer was reshaped and all marking were removed from the lock plate.


A screw was added to the thumb plate, which seems like a very small and weird feature, but it is something that is very distinctive of COS muskets.


The coolest thing about this musket is on the barrel. Lodgewood relocated all legally required markings to hidden spots to achieve a period correct look. They then stamped MARYLAND on the barrel in accordance with the specifications from the Maryland COS. Fortunately, I was able to find one surviving example of the Maryland proof stamp, which is on a COS pistol in the collection of the Smithsonian (to the right).

When Lodgewood and I were working on this build, they pointed out that the proof marks on the Smithsonian example are engraved as opposed to stamped like the instructions from the COS stipulate, but they could still stamp to the same font, and most likely the proof stamp would have broken after being used many times because they were made from softer steel and not hardened properly. That is probably the reason that the Smithsonian COS pistol is engraved and no other Maryland COS muskets (that I've seen) have the proof marking. After much deliberation, I decided to have Lodgewood stamp the barrel.

About two weeks later, I ran across a letter to the Maryland COS from one of the musket inspectors out in the field. He wrote mostly about how gunsmiths really did not like that he wanted to proof all of their barrels by loading it with double the prescribed amount of powder BEFORE they got paid. But he also mentioned that he broke the proofing stamp from use.

Wednesday, July 25, 2018

Coat Linings

As I mentioned in an earlier post, I am in the process of reconstructing many of my current garments to make them more historically correct. Aside from stitching techniques, I am also trying to make my construction in line with extant garments. In my experience, I have found that most reproduction civilian garments are lined with some form of plain light linen because it's cheaper, cooler, and easier to construct than alternatives. However, if you browse the museum collections, you will find that linings are typically a combination of textiles, typically consisting of a silk or worsted woolen fabric on the parts of the lining that may be visible as your body moves and a cheaper fabric (linen) in the unseen back portions.

They most common lining colors that I have come across are gold, silver, and black. While those colors would go well with my green broadcloth coat, I wanted to see if any extant green wool coats were out there and see what they were lined with. That's when I ran across this beauty in the Royal Ontario Museum.

Not only is there an extant green broadcloth frock coat from the 1770s, the ROM has photos of the lining of the matching waitscoat. Check it out. I have never seen anything like this. The only way I could describe this is half-lined. The lining is truly minimalist by only extending to the what may be seen during wear and then quickly terminating into the interfacing. The rest of the waist coat is constructed like an unlined garment, save for the back panels that are fully lined in silk. Strange.

 It makes me curious as to what is going on inside of the coat. Potentially, the silk coat lining may end a few inches past the coat edge. I'm curious as to why this was done. Perhaps, the customer only had a set amount of silk and the tailor was working around a shortage? Perhaps, the customer wanted and unlined suit for summer wear, but still wanted to give the appearance of a lining? But what's the deal with the silk back panels in the waistcoat? Maybe it was altered?

Whatever the case this is very interesting.


Monday, July 16, 2018

Finished Waistcoat and Playing a Tailor

Got the waistcoat done in time for my event at Fort Frederick portraying a refugee. Didn't get my diet done in time though 😂 Maybe if I wasn't spending all my time sewing, I would have enough time to exercise. I'm pushing the "tight without constraint" a little bit. I may not be constrained but my buttons sure are.

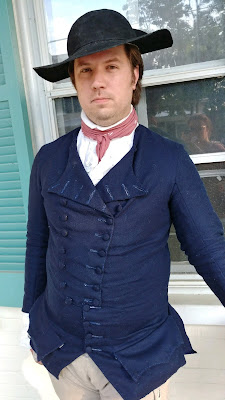
For this event, I was portraying a refugee tailor who was forced to leave his home in a state of undress, thus only the sleeved waistcoat and no coat. As per usual, no pictures of me were taken at the event, but my wife snapped this one at home before I changed back into 21st century attire. It was a fun event, I spent most of my day working on mariner cuff flaps for for my waistcoat and making death head buttons and talking to visitors.

It was a nice day and a great event. I'm hoping to be doing some new stuff at Fort Frederick in the next few months, but those plans are in the very early stages at this moment.


UPDATE!!! Someone got a picture of doing things! See ma, I don't just dress up like a weirdo for the fun of it.

Word of advice to anyone sewing in a historical manner. Never sit tailor style on a bench. The edge will dig right into your ankle bone and completely cut of the circulation in your foot. Then you may or may not try to stand up and fall over because your foot is completely numb. Spoiler warning: you will fall over. Anyways, here's us sewing at Fort Frederick during the "Repair to the Fort," Pontiac's War event. As always, I'm making a stupid face.


Thursday, July 12, 2018

Failures in Hat Making

Failure is the best way to learn. The only hope is that when you do fail, you can salvage it into something that will be useful. This was a decent failure in my book, but I think that the lessons learned will make a load of difference the next time that I venture into hat making.

I wanted a fantail hat for less formal occasions that provides more shade than a cocked hat. The design is fairly simple in theory: cock up the back of a round hat and call it a day. There are so many 18th century re-enactors who wear hat blanks as their headgear so this should be a walk in the park. If only it was that easy.  I am not a conscientious objector. If I know that something is wrong, I can't ignore it and say close enough, which is why I couldn't cock the back of hat blank and call it a day.

Many sutlers sell wool hat blanks of a decent quality wool and manufacture that are a good starting point for making a hat. The big problem though is that the blanks are oval blocked as opposed the round blocked, which was exclusive to the 18th century. What does that mean to a non-hat affectionato? The crown on an 18th century hat is a circle as opposed to an oval. The hat won't fit your head as well because your head is not perfectly round, but the crown being the wrong shape is very visible when you can see most of the brim.

My first task was to shape the crown to make it round. If you've ever looked at hat blocks, wooden versions are mad expensive, do not come in a perfectly round pattern, and most will not produce a hat that will fit my giant, 24 1/4" head. To get the round shape, I cut a circle out of a scrap piece of 2x12 that I had laying around. I figured that I would need to make the base of the crown perfectly round using the wood piece, but I could adjust the top part of the crown by hand to make it round throughout. That plan worked for the most part.

I steamed the crown of the hat blank with a kettle to make the wool pliable and then put it over the round block. The band immediately became round, and the crown became misshapen. No problem though, it was to be expected. I put the hat blank on my plywood stand, creased the edges on the band with an iron, and weighed down the brim with some heavy books. Then, I left the hat on the wood piece for a few hours to dry and spot shaped the top of the crown later with a spray bottle and iron. Once I was happy, cut the brim to shape and admired my handiwork. 

The next day, I stiffened the brim using the period application of 2 parts clear shellac to 1 part denatured alcohol. I let that dry and then my hat was ready to be styled... except it didn't fit on my head. Because I was a dummy and didn't let the wool completely dry on the wooden disc, the entire crown shrunk as it dried. It shrunk over 1.5" total making the hat completely unwearable to me. 

I had to resteam the crown to stretch the brim back out. After letting it dry for a few hours, I again spot shaped the crown, and immediately put the hat back on the wood disc so that it would not shrink again. It did not. Unfortunately, because of the multiple steamings, shrinkings, and shellacings, my hat looks a little more worn than it's brand new condition. The crown is lumpy, the brim is warped in places, but it looks like a used hat, so I guess that's a plus. 

Like I said, I failed pretty hard shaping this hat, but I learned a lot. For next time, I'm going to just start with a piece of unshaped felt to make my hat. I found a place that sells round blocks for less than $30 that are made from automotive plastic that will fit my head and stand up to the steam treatment. I will also staple down the raw edges of the hat during the drying process to make sure that everything is even and does not warp. I will also do the hardening process while the hat is stapled down and before cutting. Hopefully it all works, and I will be on my way to hat independence. 

Wednesday, July 11, 2018

Fireplace Restoration

We'll take a break from sewing for a bit. I've been working to restore my parlor since last September and am starting to see the light at the end of the tunnel. One of the biggest undertakings was the restoration of the fireplace. Originally, the fireplace was covered with a mantel that went half way up the wall that was adjusted with some cheap plywood to make an arched opening. Behind the arch was yet more plywood that covered the brickwork of the original fireplace.

I wanted to make the fireplace consistent with the decor of the rural federal style, which involved floor to ceiling wood work. My first step was to remove the existing mantel to reveal the brick and see what I was dealing with under the plywood. I immediately realized why the plywood was there when I saw the shoddy masonry underneath. Seriously, who puts in a random cinder block when you run out of bricks! I'm good with wood and I'm good with iron, I have no experience with masonry. Luckily, I'm having a chimney company come out and tear down the crap masonry and they are going to turn it into a false firebox. I would have preferred a working fireplace, but the furnace exhaust that runs behind the bricked up wall prevents that from happening.

The first step is leveling out the wall brick around the brick to frame the fireplace opening, as seen in the picture on the left.  Luckily, the difference between the expose brick and the plaster wall was 3/4" so I was able to use 1" plywood to level the wall. After that, I framed the fireplace exterior and the walls with wood and moulding. To make the framing boards of the period, I routed a bead into the ends.

Once the fireplace was framed, I moved up the wall first starting with the mantel. Mantels in the Federal era a often small and made using and upside-down piece of crown moulding. That's exactly what I've used here. The mantle itself is only about 4" deep and sits a on the crown moulding. You can see the finished and painted mantel on the right.

The most frustrating part came next. I wanted to install two raised wainscoting panels above the mantel. I first tried using a wainscoting bit on my router table to cut the edge into the panels, but it didn't work. I think that the size and density of the pieces made it so that the router bit kept ceasing and it ruined a few panels. To cut the edges, I ended up making a sled for my table saw that slides over the gate. I raised and angled the saw blade appropriately to cut the panel edge, and clamped my panels to the sled. Then it was a simple slide down the track to get clean, solid wainscoting panels.


After mounting and painting the panels, I finished the job by installing two tin scones and display pegs for my musket. The musket is super cool by the way. It is a Pedersoli reproduction Brown Bess that is modified to be a Maryland Council of Safety musket that was made in Maryland during the American Revolution. This musket conforms to the orders placed by the Provincial Assembly of Maryland and even includes the proof stamp on the barrel that was supposed to be on all muskets. This is a one of a kind musket. 


The fireplace looks fantastic, and I can't wait for the mason to do his work and clean up the brick work. Then it will truly be done.

Monday, July 2, 2018

I Don't Speak French

I love primary sources for historic research. I'm a big fan of original recipes, instructional books, and journals. There's a great source document for tailoring methods from 1767 titled: L'Art du Tailleur by M. de Garsault. The short book lists the tools and methods of 18th-century tailoring and also provides a series of plates with stitch diagrams and patterns.

Fortunately, the book has been scanned into the public domain and can be easily be found online. Unfortunately, it's in French. However, I managed to find an English translation of the text and the plates: The Art of the Tailor

It's a good read for anyone interested in the construction of 18th century men's clothing from an original source. You will need to have a minor understanding of basic sewing and 18th century clothing for it to make sense, but it's well worth the read.