Stays suck! Ask any reenactor about stays and they probably have some sort of horror story or humorous digression about them. My reluctant journey into stays started helping my wife with hers. She made a pair using a well documented commercial pattern and they never quite seemed to do the job. First, the reed cane bones would escape the channels, so I bound them. Then a few of the reeds snapped, but there was nothing we could do about that. Then they kept moving weird, or digging into her legs and torso when she sat or bent, they felt to long, or maybe too loose--all we knew was that something wasn't right.
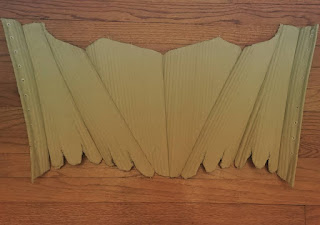 |
| The Functional Product |
So what do you do when the altered purchased pattern doesn't fit right? You guessed it, something stupid. "I'll just learn to draft stays, and I'll make you a new pair," is what I said. What I should have said though is: "I'm a big stupid head, but I'll make you some stays because I love you and I don't want you to be uncomfortable. But seriously, we may want to get me institutionalized."
Fortunately, this really sweet book just came out that I would consider THE book on stays and all sorts of other ladies' under things. It's called
Patterns of Fashion 5 and it is an amazing book. It can only be purchased through the School of Historic Dress in the UK here:
http://theschoolofhistoricaldress.org.uk. The reason that I say that it is THE book on stays is due to the primary source information on the entire process creating stays, including methodology to draft stays from the wearers measurements.
No trade secret giveaways here, just buy the book and we'll discuss. My distilled notes just on making 18th century stays fill six full pages. It is comprehensive to say the least. Long story short, I did a ton of research and applied the methodology in this book to draft my wife a pair of stays.
What I learned from the study of stay makers is that I believe that most modern stay makers are going about it the wrong way. From the information gleaned from the primary sources the cutters and stay makers main concerns is the proper fit of the bust and waist. They need to be properly measured and at the right places on the body so that the stays fit properly, do not move, and do not cause discomfort. Everything else for the most part is superfluous (within reason) and at the behest of the maker or wearer.
We get so caught up in trying to create an exact replica of an original garment that we miss the mark on certain things. Yes, those beautiful silk stays may have a low back and low swallow tail, but why were they made that way? Those features may look good and feel fine when standing at a ball, but a working woman may find that she can't bend over to cook with the low swallow tail, and that the low back provides no support.
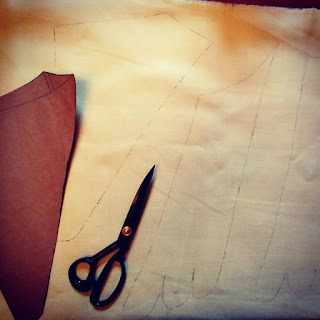 |
| Drawing the drafted pattern on to the fabric |
Like the 18th century cutter, you should make your pattern conducive to how the garment will be worn. For this reason, you will notice that the back on these stays comes up high to offer support during work, but not too high. The swallow tail and tabs are not huge. The still provide the proper silhouette, but allow the wearer to bend and sit without causing discomfort.
Measuring and drafting was not as bad as you would think. I suggest using the paper tape method because you are less likely to try to rationalize the body with units of measure and will just do it. It's weird at first but trust me, it works.
Your measurements need to be tight and accurate. I cannot stress this enough. Adding even 1/8 inch error to each edge of every panel can compound across eight panels into an error of 2 inches. Be tight, accurate, and consistent, and you won't have to do it again.
I drafted her stays, and then cut the mock up from some shipping boxes that we hadn't recycled yet. If you ever to this method, I've noticed that a duck tape butt stitch doesn't actually work and you will get gapping in the seams. Make sure that you account for any of these seam gaps when making your adjustments. I had 1.5 inches total seam gap caused by the duck tape.
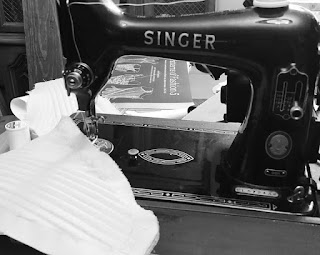 |
| Artistic shot of sewing boning channels |
In retrospect, the mock up went near perfect, though I didn't feel that way at the time. I had to take off 3.75 inches of material to get them to fit properly. Ok, I know that doesn't sound like it fit perfectly, but check this out: The stay drafting methodology drafts the pattern from the center front of the torso to the center back, which means that if drafted properly, the stays will fit the wearer perfectly, when enclosed. That leaves no spacing for lacing in the front or back. So remove 2 inches for lacing, and my error is reduced to 1.75 inches. We've already discussed that the gapping in the duck tape added 1.5 inches across the total garment, so that makes my true error 1/4 inch! I was impressed then. And even more impressed when the finished product, with 1/4 inch removed, first perfectly with a 2 inch gap for lacing.
I did have to make a few adjustments to the mock up. I moved the front of the arm scythe forward a bit because it was digging and brought the swallowtail on the front up a little bit. I took these adjustments, and then drew a final pattern for her stays. Then the fun part started. Actually making the things, which I will cover later because I think I've rambled enough for one post.


